js13kGames: Tricks applied in Risky Nav
From the 13th August to the 13th September I participated in the js13kGames competition. My entry Risky Nav can be seen here and the source code is on GitHub here. In this blog post I will explain some of the tricks and techniques I used in making my game.
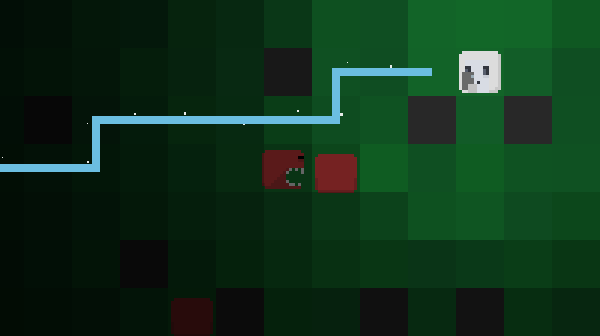
The game is tile based, so everything – player, monsters, goal – is always positioned at a (x, y) position on a 2D map.
About the background
The background is a single image which is created once right at the beginning. It is drawn on a canvas and each tile is 1px big. In the rendering loop it is then up-scaled to the desired tile size. To avoid a blurry image, it is necessary to disable anti-aliasing.
context.imageSmoothingEnabled = false;

let w = bgCanvas.width * tileWidth;
let h = bgCanvas.height * tileHeight;

function renderLoop() {
    context.drawImage( bgCanvas, 0, 0, w, h );
}
About the fog/shadow
The fog/shadow around the player is done in a similar way as the background. The image is pre-rendered with each tile being 1px and then up-scaled in the main loop. But it moves with the player. The darkness is determined by the euclidean distance from the player.
for( let y = 0; y < fogMapHeight; y++ ) {
    for( let x = 0; x < fogMapWidth; x++ ) {
        // Euclidean distance from origin.
        let de = Math.sqrt( x * x + y * y );

        // Darkness only starts 2 tiles away from the player.
        // f has to be a value between 0 and 1.
        let f = ( de < 2 ) ? 0 : Math.min( 1.15 - Math.min( 3 / de, 1 ), 1 );
        fogCtx.fillStyle = `rgba(0,0,0,${f})`;
        fogCtx.fillRect( x, y, 1, 1 );
    }
}
Path finding
The path finding for the navigation in the game can be done in a rather cheap fashion, thanks to a lot of restrictions. First, we only have a 2D map in which no diagonal movement is possible. Second, the goal and all obstacles have a static position so the map never changes. The only changing variable is the player position.
This allows to pre-calculate all the possible paths before the game starts. In the game we then only have to find the shortest path out of those already known. The algorithm to create a path map is:
- Initialize all fields with the value
0. - Give the field of the goal the value
1. This is our step counter. - Mark every accessible field around the goal (up, down, left, right) as one step higher – with the value
2. - Repeat this for every field. So fields around the second one have the step value
3and so on.
Here is an example. For better readability the unaccessible fields ("stones" in the game) are marked with a - instead.
[ ][ ][ ][ ][ ][-]
[ ][-][ ][ ][ ][ ]
[ ][-][ ][ ][1][ ]
[ ][ ][ ][ ][-][ ]
[ ][ ][ ][ ][ ][ ]

After the first marking:
[ ][ ][ ][ ][ ][-]
[ ][-][ ][ ][2][ ]
[ ][-][ ][2][1][2]
[ ][ ][ ][ ][-][ ]
[ ][ ][ ][ ][ ][ ]

And after that:
[ ][ ][ ][ ][3][-]
[ ][-][ ][3][2][3]
[ ][-][3][2][1][2]
[ ][ ][ ][3][-][3]
[ ][ ][ ][ ][ ][ ]

Final form:
[7][6][5][4][3][-]
[8][-][4][3][2][3]
[7][-][3][2][1][2]
[6][5][4][3][-][3]
[7][6][5][4][5][4]
When searching for a shortest path while the game is already running, we can now look up the player position in this map. We then instantly know how many steps it will take from our current position to the goal. To gather the concrete path, we check every field around the current one and select the one with a step value of 1 smaller. So assuming we stand on a field of value 5, we then select a field around us with value 4. Repeat and move to a field of value 3 and so on until we are at field 1 – which is the goal.
Better arrow key control
Just using the keydown/up events is not the best way to handle the controls. The keydown event fires repeatedly, but there is quite a break between the first event and the following repeated ones. Also the speed the events are fired at is most likely different from the speed of the game loop.
So instead you use the keydown/up event to keep track of the key states. In the game loop you then query the current state.
- For every
keydownyou save as information the key and the current timestamp. - For every
keyupyou reset that timestamp to0ornullor delete it.
let state = {};

document.body.onkeydown = ( ev ) => {
     state[ev.which] = Date.now();
};

document.body.onkeyup = ( ev ) => {
    state[ev.which] = 0;
};
In the game loop you can then do the following:
if( state[40] ) { player.moveDown(); }
else if( state[37] ) { player.moveLeft(); }
else if( state[39] ) { player.moveRight(); }
else if( state[38] ) { player.moveUp(); }
However, this can still be improved. Suppose you press multiple arrow keys at once. Currently it is a fixed order: Down is priorized over left is priorized over right is priorized over up. This can be confusing or downright annoying because it is not intuitive. The last pressed arrow key should always be the one being used. Let's add a function:
function getLastArrowKey() {
    let down = state[40] || 0;
    let left = state[37] || 0;
    let right = state[39] || 0;
    let up = state[38] || 0;

    let values = [down, left, right, up];
    values.sort( ( a, b ) => b - a );

    let max = values[0];

    if( !max ) {
        return null;
    }

    if( max === down ) { return 40; }
    if( max === left ) { return 37; }
    if( max === right ) { return 39; }
    if( max === up ) { return 38; }

    return null;
}
This will return the arrow key which has the most current timestamp. Now adjust the handling in the game loop:
let arrow = getLastArrowKey();

if( arrow === 40 ) { player.moveDown(); }
else if( arrow === 37 ) { player.moveLeft(); }
else if( arrow === 39 ) { player.moveRight(); }
else if( arrow === 38 ) { player.moveUp(); }
Applying those two techniques, the player will now move 1) at a steady rate the moment a key is first pressed down, and 2) even if multiple arrow keys are pressed, the last one is used. Even if the last one is released, then the one which has been pressed before that (and has not been released yet) will be used.
The little things
Some other, maybe not so obvious gameplay improvements:
- Player and goal have a minimum distance at game start. Otherwise it would be too easy.
- The player always starts near a map border, but not the bottom one. If the player started at the bottom, he most likely would walk up and the character face would not be visible.
- Monsters are randomly placed, but always a minimum distance from the player. Avoid that the player gets killed right away in the first seconds.
- It is Game Over on the second hit. After the first hit, the player is invincible for 2 seconds to give him a chance to get away.
- Using path finding, check if there is a guaranteed path between player and goal before the game starts.
- The monsters are dump and try to take the most direct way to the player. This means they could get stuck on stones. To prevent this, they take a random step if the next tile is not an accessible one.