sebadorn.de

Dead Cells: PS4 controller support on Linux

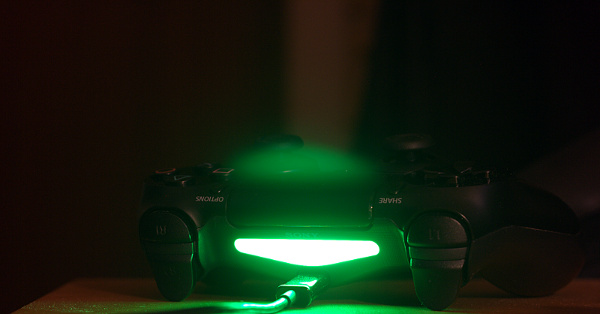
Dead Cells is a game, it is really good, and it is available for Linux. However right after installation (version 1.0 from GOG) it did not recognize my PS4 controller. It could not be a problem with the controller itself or Linux in general, because the DS4 worked with other applications – for example it showed up perfectly fine in jstest-gtk (0.1.0).

After some research I came across this reddit post. Dead Cells uses the SDL library, so maybe that's it. I followed the instructions and built and ran sdl2-jstest. The output should contain an entry like this for the DS4 (2nd gen):

Joystick Name:     'Sony Interactive Entertainment Wireless Controller'
Joystick GUID:     030000004c050000cc09000011810000
Joystick Number:    0
Number of Axes:     6
Number of Buttons: 13
Number of Hats:     1
Number of Balls:    0
GameControllerConfig:
  Name:    'PS4 Controller'
  Mapping: '030000004c050000cc09000011810000,PS4 Controller,a:b0,b:b1,back:b8,dpdown:h0.4,dpleft:h0.8,dpright:h0.2,dpup:h0.1,guide:b10,leftshoulder:b4,leftstick:b11,lefttrigger:a2,leftx:a0,lefty:a1,rightshoulder:b5,rightstick:b12,righttrigger:a5,rightx:a3,righty:a4,start:b9,x:b3,y:b2,platform:Linux,'

… or like this for the DS4 (1st gen):

Joystick Name:     'Sony Computer Entertainment Wireless Controller'
Joystick GUID:     030000004c050000c405000011810000
Joystick Number:    0
Number of Axes:     6
Number of Buttons: 13
Number of Hats:     1
Number of Balls:    0
GameControllerConfig:
  Name:    'PS4 Controller'
  Mapping: '030000004c050000c405000011810000,PS4 Controller,a:b0,b:b1,back:b8,dpdown:h0.4,dpleft:h0.8,dpright:h0.2,dpup:h0.1,guide:b10,leftshoulder:b4,leftstick:b11,lefttrigger:a2,leftx:a0,lefty:a1,rightshoulder:b5,rightstick:b12,righttrigger:a5,rightx:a3,righty:a4,start:b9,x:b3,y:b2,platform:Linux,'

Take the value behind Mapping and add a line in your /etc/environment file like this:

SDL_GAMECONTROLLERCONFIG='030000004c050000cc09000011810000,PS4 Controller,a:b0,b:b1,back:b8,dpdown:h0.4,dpleft:h0.8,dpright:h0.2,dpup:h0.1,guide:b10,leftshoulder:b4,leftstick:b11,lefttrigger:a2,leftx:a0,lefty:a1,rightshoulder:b5,rightstick:b12,righttrigger:a5,rightx:a3,righty:a4,start:b9,x:b3,y:b2,platform:Linux,'

After the next reboot everything should be working. Or if you want to test it right away without reboot, then you can just add it to the start script of the game. Assuming you used the standard installation path from the GOG installer, the file is located at ~/GOG Games/Dead Cells/start.sh. Change the file so it now begins with:

#!/bin/bash
# GOG.com (www.gog.com)
# Game

export SDL_GAMECONTROLLERCONFIG='030000004c050000cc09000011810000,PS4 Controller,a:b0,b:b1,back:b8,dpdown:h0.4,dpleft:h0.8,dpright:h0.2,dpup:h0.1,guide:b10,leftshoulder:b4,leftstick:b11,lefttrigger:a2,leftx:a0,lefty:a1,rightshoulder:b5,rightstick:b12,righttrigger:a5,rightx:a3,righty:a4,start:b9,x:b3,y:b2,platform:Linux,'

That's what worked for me. If it still doesn't for you, try adding some udev rules as described in my article Using NW.js to communicate with a DS4 controller.


JavaScript source protection with NW.js

You can minify and uglify JavaScript files, but technically the source code of your distributed NW.js application is still readable. But NW.js also provides the means to compile JavaScript to a binary file and then load it as part of the application. The command line tool nwjc to create the binary file is included in the SDK version.

Assuming you have a JavaScript file js/private.js:

'use strict';

function secretFunction( foo ) {
    return foo * 4;
};

Then you can compile it like this to a file js/private.bin:

$ ./nwjs-sdk-v0.30.5-linux-x64/nwjc js/private.js js/private.bin

Internally the tool uses the V8 snapshot feature, which means the versions have to match. A binary file created with NW.js 0.30 can only be loaded by 0.30. Binary files also do not work cross-platform. For each platform it is necessary to compile its own binary file with the SDK for the same platform.

To then load the binary file in your application, it works like this:

let win = nw.Window.get();
win.evalNWBin( null, 'js/private.bin' );

let value = secretFunction( 4 ); // returns 16

Note however that the loading is per window. If you open another window in your application, the file has to be loaded there again.

Using the DevTools you can of course find the functions and variables which have been loaded from the file. The function implementation however is protected:

> String( secretFunction )
< "function secretFunction() { [native code] }"

DevTools issues

Update 2018-12-15: Since NW.js 0.34 this issue seems to be fixed. Loading binary files works even with the DevTools open.


There is an issue with loading binary files and the DevTools. Basically you cannot have the DevTools open and then load the file. There will be no error, but the contents will not be available. This is a known issue.

My temporary solution is to just close the DevTools. But just closing them right before is not enough, you also have to use a timeout before loading the file:

let win = nw.Window.get();

// Function is only available in the SDK build.
if( typeof win.closeDevTools === 'function' ) {
    win.closeDevTools();
}

setTimeout( () => {
    win.evalNWBin( null, 'js/private.bin' );
}, 500 );

But why not check first if the DevTools are open? Then you could open them again afterwards. According to the API documentation there is win.isDevToolsOpen(). But it exists only in the documentation. Using the SDK build there is de facto no such function. This too is a known issue.

Wine for Windows

I successfully used Wine 3 to compile a binary file for the Windows version of a NW.js application and then load it there. So if you are on Linux or macOS you will not need Windows for your build process. You should of course still test your application to make sure it works on all targeted platforms.


Using NW.js to communicate with a DS4 controller

DS4 green light

NW.js still provides the Chrome Apps API which has been removed from Chrome, but not ChromeOS. This will allow us to access in a platform-independant manner devices which are connected with the PC per USB.

Without this API, a 3rd party Node.js module like node-hid could be used. This will however come with platform-dependant libraries and will have to be updated or rebuild each time the Node.js version changes.

This article concentrates on sending data to the controller. However it is also possible to retrieve data like pressed buttons using the established connection. Aside from using chrome.hid there is also the Gamepad API for read-only access.

Identifying the controller

First we need a way to identify the DS4. Devices come with a vendor Id and product Id. According to the Gentoo Wiki they are as follows:

Device Vendor Id Product Id
DS4 (1st gen) hex 054C / dec 1356 hex 05C4 / dec 1476
DS4 (2nd gen) hex 054C / dec 1356 hex 09CC / dec 2508

Having tested with both devices, I can also confirm the Ids.

Get the device

For all communication with the device, we will use the chrome.hid API. First we define a filter using the vendor and product Id, and then query the available devices:

var filter = {
    filter: [
        { vendorId: 1356, productId: 1476 },
        { vendorId: 1356, productId: 2508 }
    ]
};

chrome.hid.getDevices( filter, ( devices ) => {
    // Error handling.
    if( chrome.runtime.lastError ) {
        console.error( chrome.runtime.lastError );
        return;
    }
    if( !devices ) {
        return;
    }

    var device = devices[0];
    // Next: Connect to the device.
};
Read more

Improvements after Mozilla’s Observatory results

Mozilla made their Observatory service public, which lets you check the security of sites. A first run resulted in an F for sebadorn.de. Following some of the sug­gestions I could improve that to a B-.

1. Redirect HTTP to HTTPS

Thanks to Let’s Encrypt I already offered HTTPS, but I didn't enforce it. Now visitors to http://sebadorn.de are redirected to https://sebadorn.de. I did so by adding the following rule to my .htaccess file:

<IfModule mod_rewrite.c>
	RewriteEngine On
	RewriteCond %{HTTP_HOST} ^sebadorn\.de [NC]
	RewriteCond %{SERVER_PORT} 80
	RewriteRule ^(.*)$ https://sebadorn.de/$1 [R,L]
</IfModule>

2. Add some more headers

<IfModule mod_headers.c>
	Header always edit Set-Cookie (.*) "$1; HttpOnly; Secure"
	Header set Content-Security-Policy "frame-ancestors 'self'"
	Header set X-Content-Type-Options "nosniff"
	Header set X-Frame-Options "SAMEORIGIN"
	Header set X-XSS-Protection "1; mode=block"
</IfModule>
Set-Cookie
Cookies about to be set received additional directives: HttpOnly and Secure. HttpOnly disallows cookies being read by JavaScript and Secure enforces an HTTPS connection. (Source)
X-Content-Type-Options
Setting this header to nosniff tells browsers not to try and guess the MIME type of contents, which potentially prevents XSS attacks. (Source)
X-Frame-Options
Setting this header to SAMEORIGIN or DENY prevents other pages from displaying the site in a frame which prevents clickjacking. (Source)
X-XSS-Protection
Setting this header to 1; mode=block tells browsers to try and detect XSS attacks and in this case stop loading the page. (Source)

Stackless BVH traversal

Im Path Tracing verwendet man spezielle Datenstrukturen für die Geometrie, um diese schneller gegen die Strahlen testen zu können. Eine der üblichsten ist dabei die Bounding Volume Hierarchy (BVH) – ein Binärbaum, der die Szene immer weiter unterteilt. Einen solchen Baum würde man normalerweise rekursiv durchlaufen. Auf der GPU mit OpenCL steht jedoch keine Rekursion zur Verfügung.

Was man daher macht, ist, selbst einen kleinen Stack zu verwalten, in dem man sich den nächsten zu besuchenden Knoten merkt. Dieser Stack benötigt jedoch zusätzlichen privaten Speicher, welcher knapp bemessen ist, und dadurch die Anwendung ausbremst. Wünschens­wert ist daher ein Verfahren, das ohne Stack auskommt.

Aufbau und Ablauf

BVH-Baum.

  • Jeder Knoten hat entweder genau zwei oder keine Kindknoten.
  • Jeder Knoten hat zudem ein Attribut nextNode.
    • Für den linken Kindknoten zeigt nextNode auf den rechten Geschwisterknoten.
    • Für den rechten Kindknoten zeigt nextNode auf den Elternknoten.
Read more